Admin Portal API Management
eFax Corporate administrators now have the ability to manage their eFax Enterprise API directly from the eFax Corporate interface.
In the eFax Corporate Admin portal, via the Edit Admin or Create Admin page > Advanced Settings > Access Rights tab, there is an API Management button. When toggled ON, the administrator will be able to manage API settings to a new or existing group. This includes:
- Generating an App ID (which enables the use of services provided by Consensus's Fax Service API)
- Generating an API Key (which essentially is the password to the Fax Service API. This is used in conjunction with the App ID to authorize the use of the API)
- Activating Inbound Webhooks and Outbound Webhooks fields to enter the app ID's inbound/outbound URLs
Once an App ID is created for a group, the same access may be granted to any user in the group. If so, then any fax numbers assigned to the user (via Assign or Unassign Fax Numbers to/from Users ) will have unique user IDs (displayed on the user’s Advanced Settings > API Details tab). (Should those numbers become unassigned, the IDs will no longer apply.)
To use the API-management settings, your account must be API-enabled. If you don't see them when you access your account, contact your eFax Corporate account manager.
Grant Administrators Access to the eFax Corporate API
The main Administrator follows these steps to grant access to the API:
- In the eFax Corporate Admin portal, go to the Users tab.
- Select the Administrator that requires API privileges.
- Click Advanced Settings.
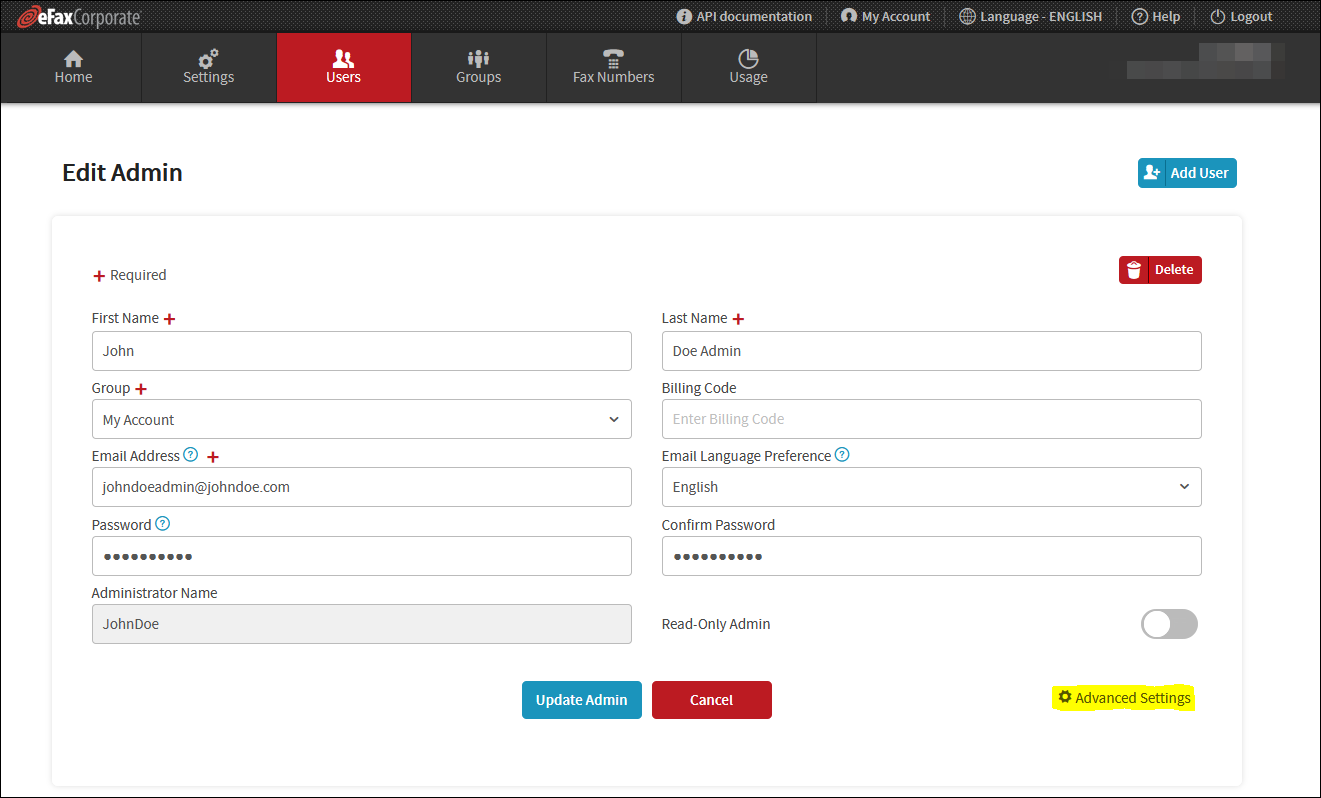
- Click Access Rights.
- Toggle the API Management function to ON.
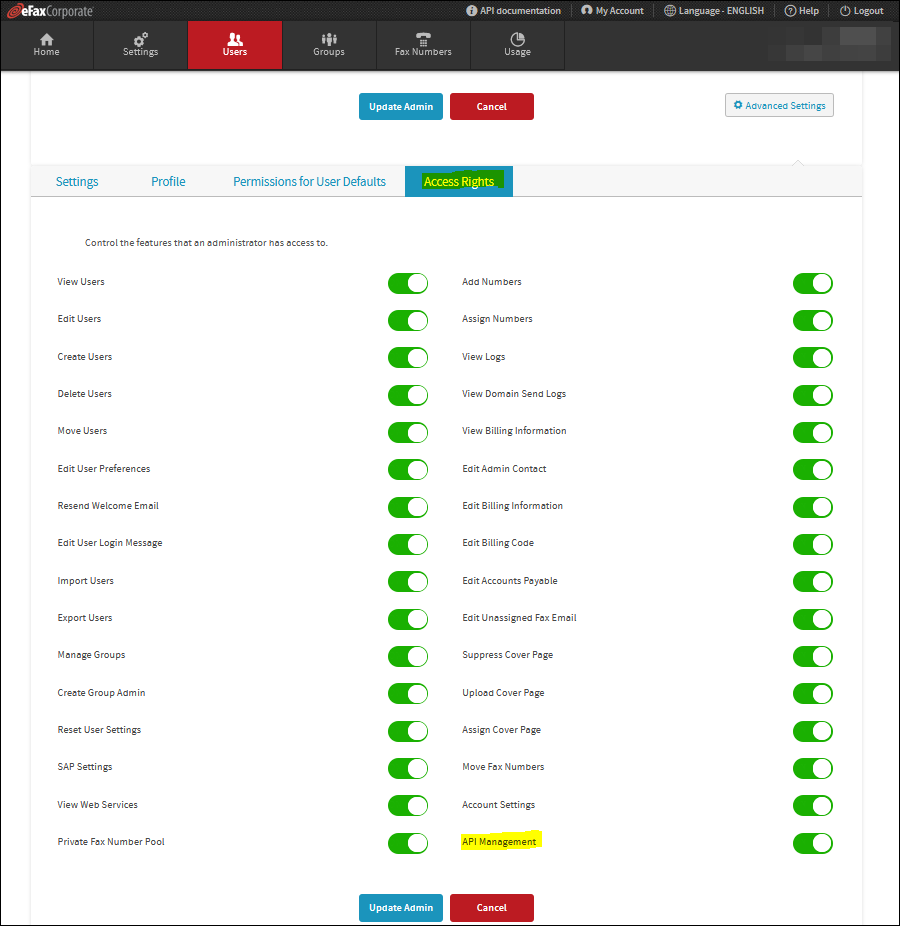
- Save this change.
Create AppIDs
Any administrator who has API management access can now create AppIDs. There is a 1-to-1 ratio between AppIDs and groups.
Follow these steps to create an AppID for either a new or an existing group:
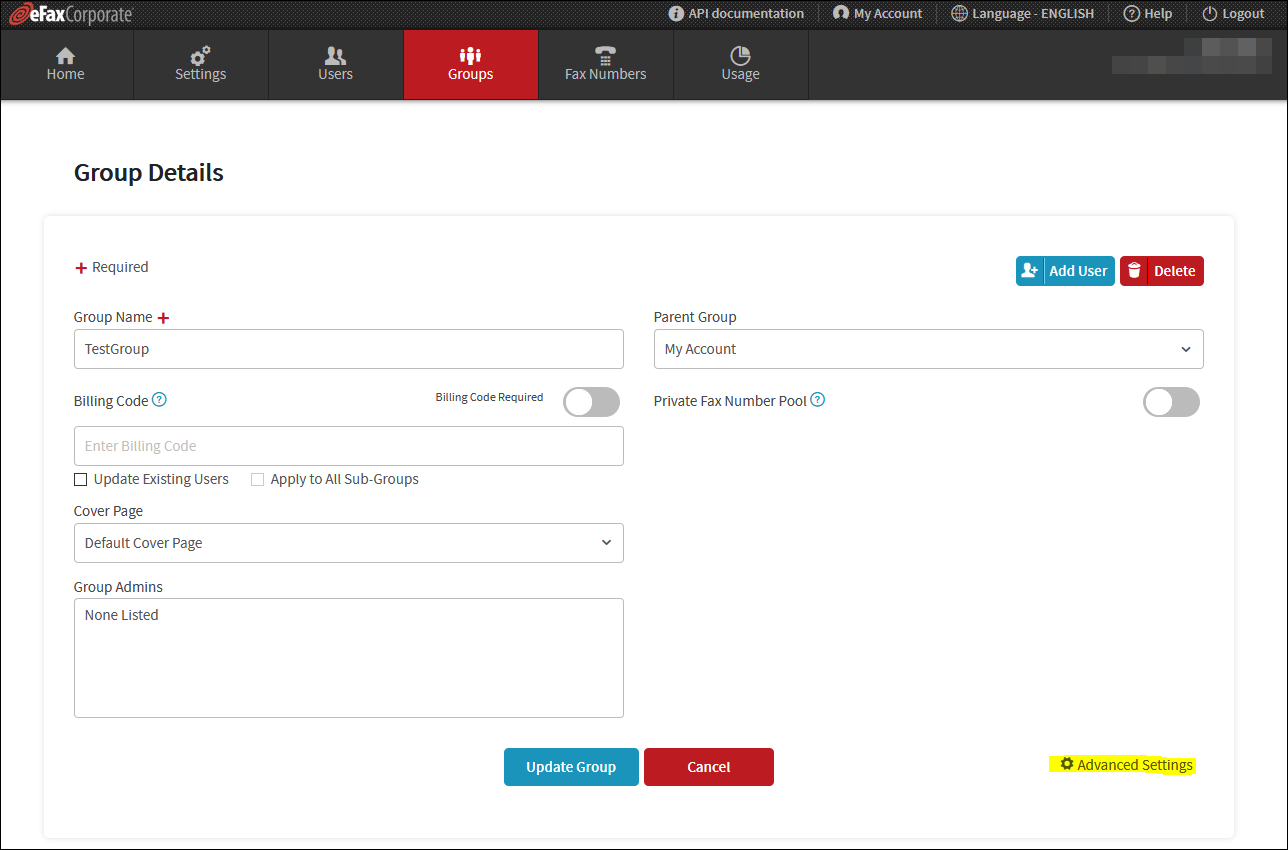
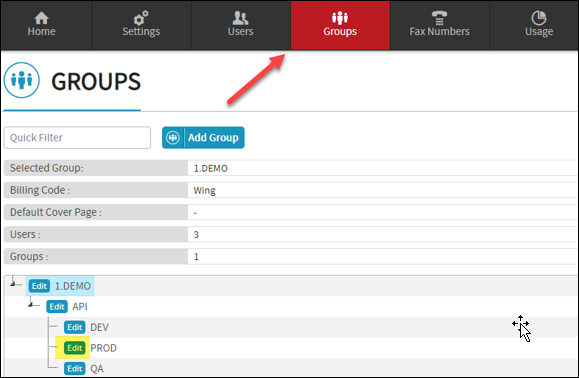
- In the eFax Corporate Admin portal, go to the Groups tab.
- Click the group you want to create an AppID for or click Create Group.
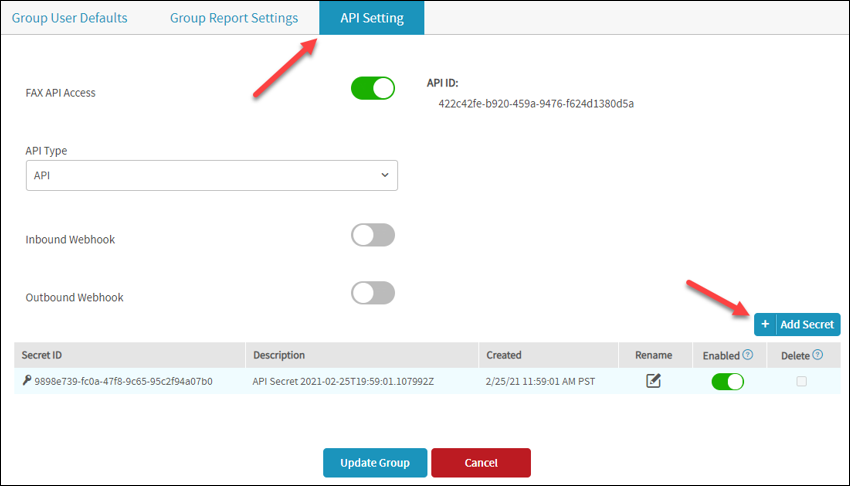
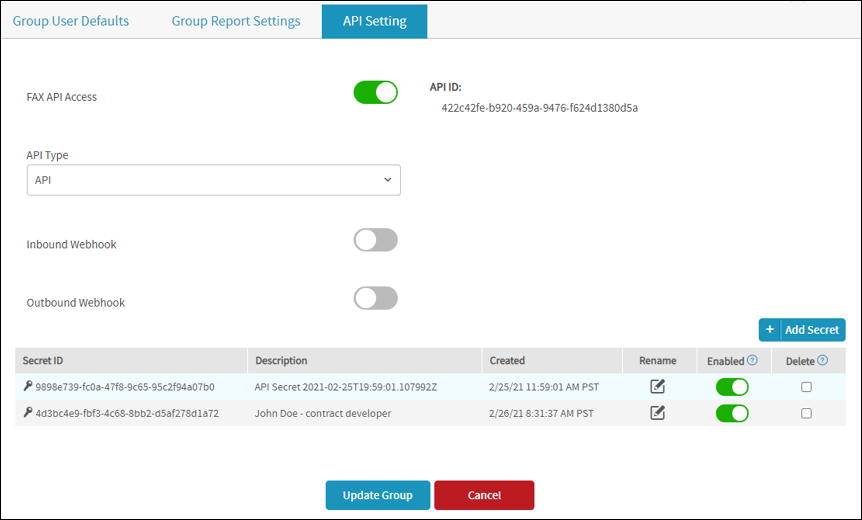
- Click Advanced Settings > API Setting.
- Toggle the Fax API Access to ON.
- Save this change. The new API ID and API Key will be provided in a confirmation message and will also be available in the Advanced Settings > API Setting tab.
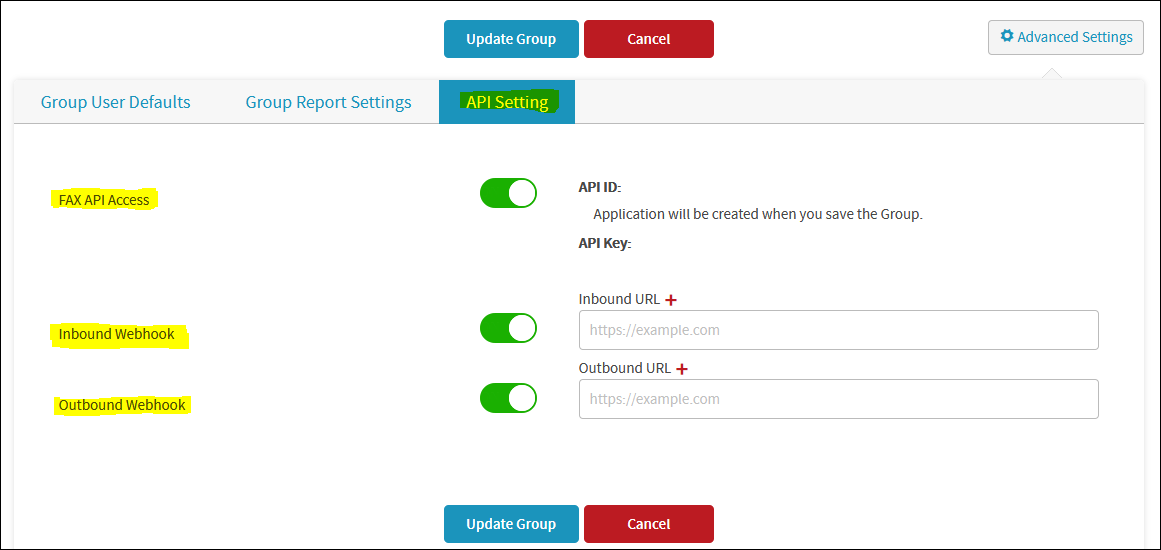
From this same Advanced Settings > API Settings tab, you can also setup your inbound/outbound webhooks by toggling them on and providing the associated URL.
Create/Edit Users for a Group
When you have an AppID for your group, the final step is to create/edit users under that group that have API access of their own.
Follow these steps to create/edit users for a group:
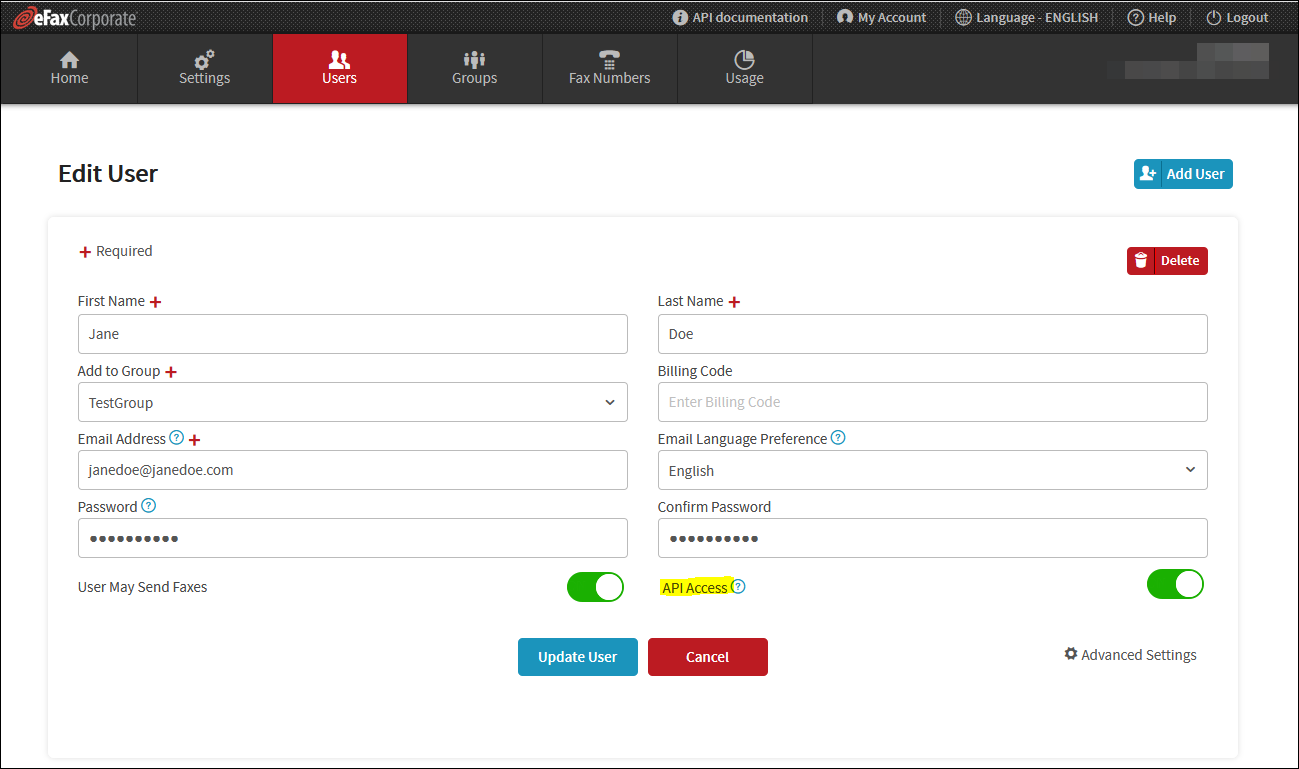
- In the eFax Corporate Admin portal, go to the Users tab.
- Locate the existing user under the group and click Edit User, or create a new user by clicking Add User.
- On either the Edit or Create User pages, toggle the API Access function to ON and save changes.
- View newly created UserIDs in the Advanced Settings > API Details page. This page lists all of the fax numbers attached to a given user and their AppID/UserID details.
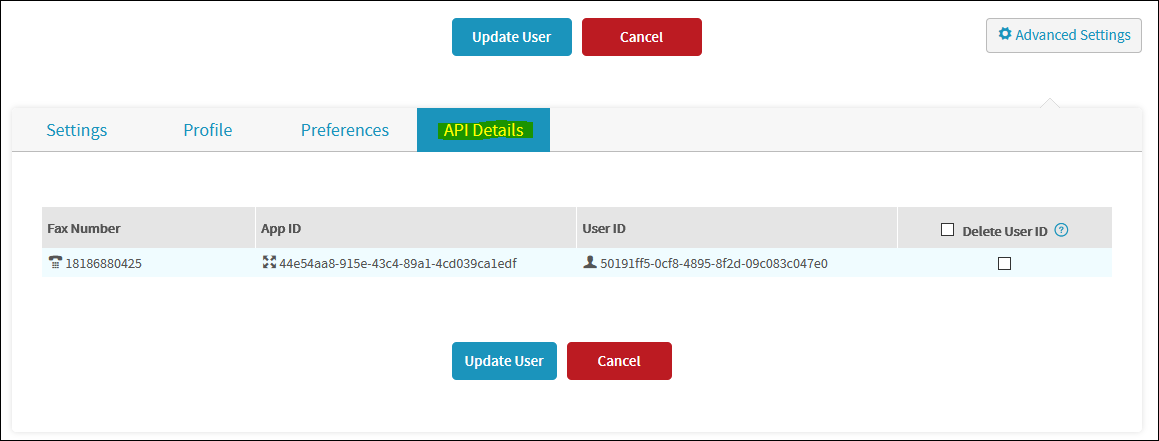
From here, if the user has multiple numbers, you can manage which fax numbers have API access by deactivating API access per number.
Add Additional API Keys
Follow these steps to add another API key to a group:
- Log into the corporate account. The Home page (your dashboard) appears.
- Click the Groups tab under the eFax Corporate header. The Groups page appears.
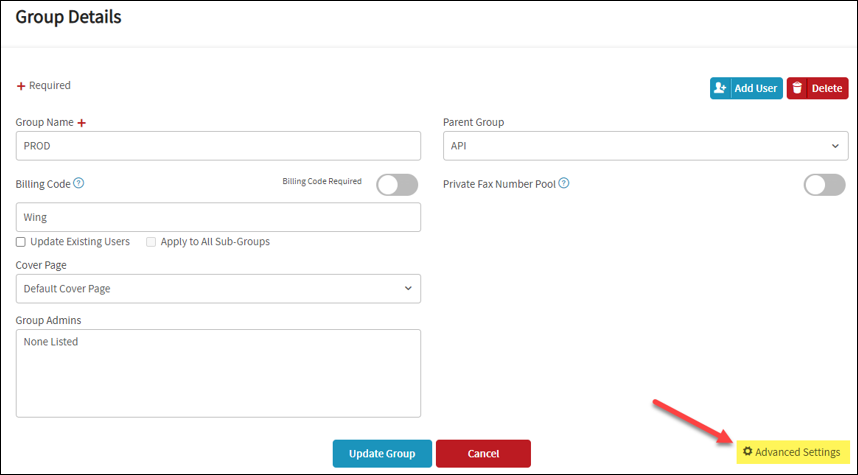
- Click the Edit icon of the group you want to access.
- The Group Details page for the selected group appears.
- Click the Advanced Settings button, then API Settings tab—and on the tab, the Add Secret button.
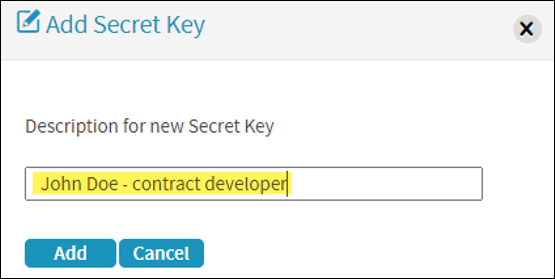
- In the Add Secret Key dialog, enter a description (e.g., API Secret 2021-02-25T19:59:01.107992Z)—then click Add. At the bottom of the API Setting tab, a Pending status for the new key’s secret ID, appears (this status is temporary – the actual secret ID will appear in place of the status when you save and exit, via the Update Group button).
- Click the Update Group button.
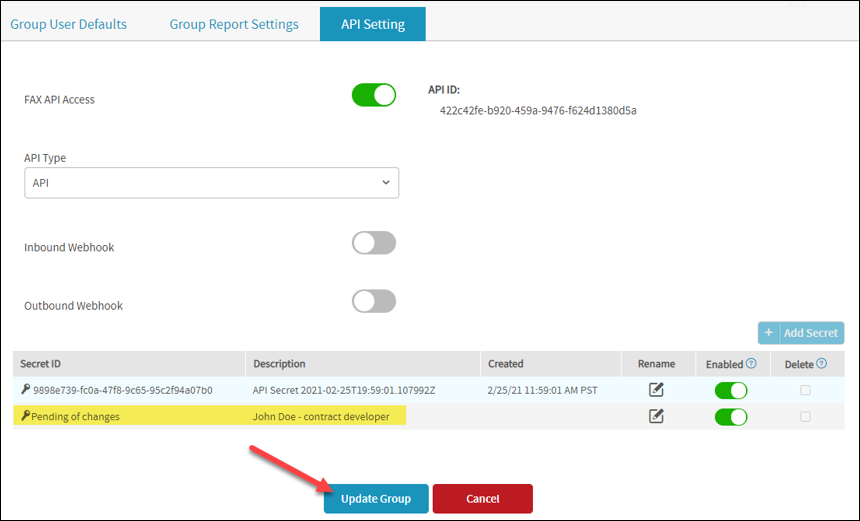
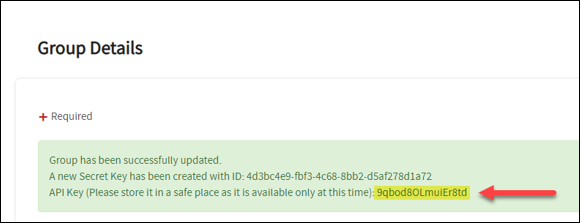
The Group Details page refreshes, with a banner showing the newly added API key and other pertinent information.
IMPORTANT! Please record (right now!) and safely store the new API key, as this banner is the only place you’re going to see it. Once you exit the Group Details page, the key is not stored in the system.